from Rob Legg Yachts | |||||
|
|
|
|
|
||
Episode 6: Designing the RL28
Our moulding crew quickly turned out the two hull mouldings needed. One was set up for mounting
the deck plug, and the other left in the mould to build the interior plugs.
Go back to Previous Episode | Go back to Index | Go on to Next Episode
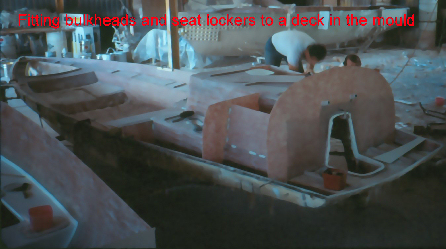
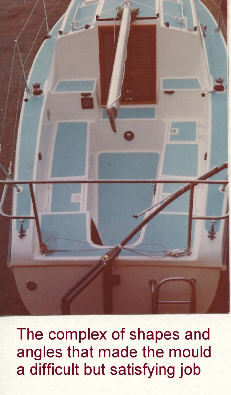
Work went ahead quickly on the interiors. They were mostly plain two-sided shapes, made of plywood and faced with laminex so there were few problems. As the plugs were finished, the moulds were built up over them in place in the hull. The deck plug was much more complex. It had to be all in one piece and contained both male and female shapes. Great care had to be taken on the cockpit, as being a male shape and, unless the sides had accurate clearance angles and a perfect finish, there would be trouble removing it from the mould. We would not be able to get at the deck and cabin sections if they got stuck during removal. (While curing, a fibre glass laminate does shrink a small amount.) When the basic construction work was done I made the decision not to include a main hatch as it didn't appear difficult to climb in and out of the cabin. Also the ideal place for the mainsheet track was on the aft end of the cabin top, no hatch cover to foul ropes or trip over when raising the mast seemed a good idea at the time. I doubt I would make the same decision today!
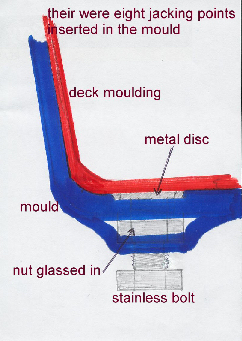
I had spent a lot of time browsing catalogues and chandlers for the most suitable fittings and had accumulated a full set ready to put in place on the plug so the non skid could be cut in around them. Unfortunately as time went on some fittings became unavailable, and the forward hatch was one that caused a problem when they became hard to procure. All window and vent cut outs were marked so that their positions would show up on the finished mouldings, and metal discs placed on the eight positions that were have small screw jacks in the mould. This time there would be no opportunity to use wedges or water to assist in removing decks from the mould, and it certainly did look a possible problem. After all the necessary preparation of polishing, waxing and a coat of PVA, the fibre glass work was completed, and a steel frame built over it as with the hull mould. It was ready to turn over and remove the plug. Unfortunately the plug did not want to come out in spite of all the jacking points, so it had to be pulled out in pieces. Fortunately the actual mould was undamaged. There was no trouble with the interior furniture moulds; they lifted off easily. At last we only had to prepare the moulds; then we could start a boat.
|