from Rob Legg Yachts |
|||||
|
Return to Tips and Modifications Page
Boat Bag for an RL28 in a Marina Pen - Keith Merkley   
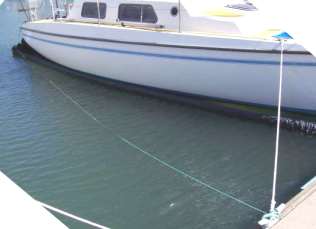
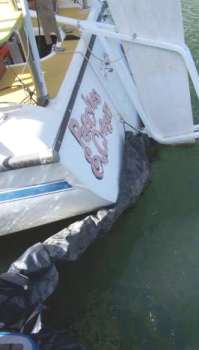
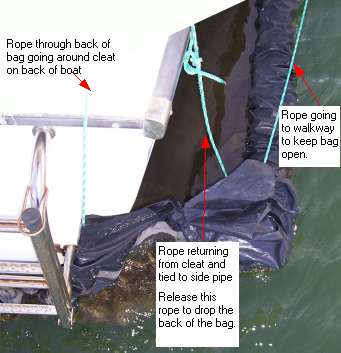
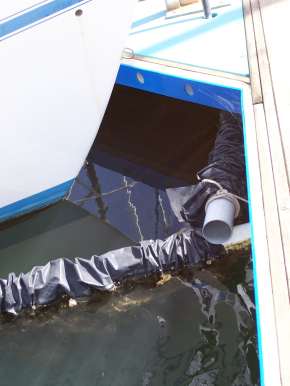
The disadvantage comes from the regular antifouling - a disgusting concoction designed to kill every living thing including the painter. The alternative is to store your boat in a boat bag which is a plastic bag under the boat where you can contain the water and add chlorine to kill the algae. These can be purchased but you can easily make your own for under $200 and I have been using mine for 12 years and can recommend it to anyone. The bag is made from the heaviest plastic sheeting you can buy. Bunnings and large garden centres sell 4 metre wide rolls for around $100 for 50 metres (price and length are from the back of the memory but you get the idea). They are available in black or orange but apparently the black lasts longer in the sun. You will need at least ten metres to allow for the pockets front and back and the fall from the surface to below the boat. The bag is suspended on three sides from pipes which float on the surface. I use 90 mm storm water pipes available from any plumbing suppliers and larger hardware stores. Three lengths are needed – each side is longer than a pipe length so an extra third of a length must be glued to a full pipe length. The pipes are sealed at the ends with endcaps. These pipes are very easy to work with but be sure to use the proper cleaner and glue because the pipes have to remain airtight for many years. The bow end also has a pipe through a pocket but that pipe sits on top of the side pipes so it doesn’t need endcaps. Don't try using 90 degree bends to join all three sides because the flexing of the pipe when the boat hits against it causes the joins to leak. Besides, it is too hard to replace the plastic. The fourth side, the opening side, has rope running through a pocket and the rope can be lifted to close off that side when the boat is stored. The pockets are made by folding the sheeting over to make a pocket of sufficient size for the pipes to feed through and welding the sheeting with the edge of an old iron. The temperature of the iron is critical; too hot and it will melt right through both sheets of plastic; too cold and the weld will pull apart. Push firmly on the iron with only the sharp edge of it toughing the plastic and move it slowly along. Use some scrap pieces to practise first. It takes a while to get the temperature and speed right. If it doesn’t seem to be holding well enough, do another weld adjacent to the first with the iron a bit hotter. Remember that the pipe will be pushed through a ten metre long pocket so make the pocket sufficiently large. To install the bag, feed the side pipes through the pockets and feed the rope through the opening end. The sheeting can be cut away from the end of the pipes so that the rope can be tied to the pipe on each side. Drop the bag in the water. Tie the nearside pipe to the pontoon by punching a hole through the sheeting under the pipe, threading a rope through and tying it to the pontoon cleats. There are normally three cleats in pontoons in marinas; one at each end and one in the middle. Now tie a light line to the end of outer pipe at the opening end of the bag and the other end of the line to the walkway. This is to keep the mouth of the bag open when the boat is not in it so it is easier to get the bow into the opening. Finally feed the end pipe through its pocket. The side pipes can be pulled together a bit at the end so this pipe only needs to be a metre or so long. Sit it on top of the side pipes and lash it there. The middle of the bag will be floating on trapped air. Drop in a couple of rocks to help sink it. Slowly put the boat into the bag with the centreboard raised. With a boat hook, grab the rope running through the end of the bag and hook it over a cleat on the back of the boat. I also cut a hole in the middle of the pocket so I can grab the rope there and put a hook on it that is tied to the boat. This stops the back of the bag sagging under the water but is not really necessary. The bag will sink in a day or so and you can then enter the bag with the centreboard half-raised to get some better steerage. Remember to pump up the board fully though when storing the boat and when reversing out or it will catch on the back of the bag. To back out, I undo the bag rope from the back of the boat, push the back of the bag well underwater with a boat hook, and push the boat back so that it is halfway out with the boat’s middle cleat adjacent to the pontoon’s back cleat and tie it there with just that one rope. The outer pipe helps hold the boat in place. Now the motor can be tilted down and started. A little more fiddly than just backing out, but only add a couple of minutes to the procedure. So what are the disadvantages of a boat bag? Coming into a marina with the board half up with a very strong side wind can make docking a bit more difficult, and don’t forget to stop the motor before it reaches the bag! Double check that your propellor doesn't turn when the motor is in neutral. The pipes will last ten years or more and the plastic will last at least three years provided you are careful with it, especially arriving and departing without pushing the outer pipe with the bow excessively. On the other hand, it does offer some assistance in that, once the bow is in the bag, the outer pipe actually helps guide the boat in and pushes it against the pontoon, especially when the wind is pushing you away from the pontoon. Just take it slowly and let the bag do the work. You must add chlorine at least every two weeks so the boat cannot be left for long periods without attention. Disposing of the old plastic sheeting is an unpleasant job as it has years of build-up on the outer side and pulling it out can make a mess of the concrete pontoon but it does hose off. Most marinas have industrial waste bins where the old plastic can be dumped. Chemicals: The recommended chemical is stabilised pool chlorine or normal pool chlorine with stabiliser added later. Without the stabiliser the chlorine will only last a day or so. I have also tried copper sulphate which is very cheap in large bags but there may be a corrosion risk if you have any metal below the waterline such as a diesel motor. Copper sulphate also lasts much longer as it doesn’t break down like chlorine. |

